
How to Prepare Your Roof for Winter Properly

How to Prepare Your Roof for Winter Properly

A small roof problem can become a major winter repair after the first heavy snow, wind event, or freeze-thaw cycle. Knowing how to prepare roof for winter gives property owners time to correct weak points before water reaches insulation, framing, ceilings, inventory, or critical building operations. In Nevada and Northern California, preparation must account for more than snow. Intense sun, high winds, sudden temperature swings, ice, and seasonal storms can all expose a roof that has been weakened over time.

How to Prepare Your Roof for Winter Before Storms Arrive

The best time for winter roof preparation is early fall, while roofing materials are still accessible and repairs can be completed in stable conditions. Waiting until a leak appears often means working around wet surfaces, snow accumulation, limited material availability, and an emergency schedule.

Start with a professional roof inspection. A trained roofing contractor can identify damage that is difficult to see from the ground, including lifted shingles, failing flashing, open seams, punctures, deteriorated sealant, soft areas, and drainage problems. On commercial low-slope roofs, the inspection should also include membrane condition, rooftop penetrations, edge metal, drains, scuppers, and expansion joints.

Do not assume a roof is in good condition because it is not leaking indoors. Water can travel beneath roofing materials and through insulation before it becomes visible on a ceiling. Catching a minor defect early is usually far more cost-effective than addressing wet insulation, structural deterioration, mold concerns, or interior repairs later.

Check the Interior for Early Warning Signs

An exterior inspection matters, but the building interior often provides useful clues. Homeowners should look in attics for water staining, damp insulation, mold-like odors, daylight around penetrations, or rusted fasteners. Facility managers should inspect upper-floor ceilings, mechanical rooms, wall intersections, and areas below drains or rooftop equipment.

Water stains do not always mean an active leak, but they should be documented and evaluated. A stain that grows after storms, or one accompanied by damp drywall or dripping water, needs prompt attention. The goal is to identify the source, not simply cover the evidence with paint.

Clear Drainage Paths and Protect Roof Edges

Standing water is one of the most common causes of premature roof deterioration. When drains, gutters, scuppers, or downspouts are blocked with leaves, pine needles, sediment, or roof debris, water can back up beneath flashing and roofing materials. Once temperatures fall below freezing, that trapped water can expand and create additional damage.

Clean gutters and downspouts thoroughly, then verify that water can discharge away from the foundation. If a gutter is sagging, pulling away from the fascia, or overflowing during light rain, it may need repair rather than another cleaning. On flat and low-slope commercial roofs, clear drains and strainers, remove debris from scuppers, and make sure downspouts are not crushed or disconnected.

Pay close attention to roof edges. Damaged drip edge, loose coping, worn fascia, and compromised metal flashing can allow wind-driven rain and melting snow to reach vulnerable materials. These details may appear minor, but they are part of the system that keeps water moving off the building instead of into it.

Repair Small Defects Before Freeze-Thaw Weather

Winter weather makes small openings worse. Water enters a cracked sealant joint or lifted shingle, freezes overnight, expands, and creates a larger path for moisture. Repeated freeze-thaw cycles can loosen shingles, split materials, and open seams on low-slope roofing systems.

Schedule repairs for missing or damaged shingles, cracked tiles, loose ridge caps, exposed fasteners, and worn pipe boot flashing. On membrane roofs, address open seams, punctures, blistering, deteriorated flashing, and areas where the membrane has pulled away from walls or curbs. Roof coatings should also be evaluated for cracking, thinning, or loss of adhesion, particularly around penetrations and drainage areas.

There is a practical trade-off here. A roof near the end of its service life may not justify repeated spot repairs. In some cases, restoration with a properly specified coating system can extend service life and improve weather resistance at a lower cost than replacement. In other cases, extensive moisture damage or widespread failure makes replacement the more dependable long-term choice. An inspection provides the information needed to make that decision based on the roof’s actual condition.

Manage Snow, Ice, and Heat Loss Carefully

Snow accumulation can add substantial weight to a roof, especially when it becomes saturated by rain or partial melting. This is a concern for homes, older structures, large commercial buildings, and roofs with known drainage issues. Property owners should have a plan for safe snow removal before storms are underway.

Avoid using sharp tools that can cut shingles, membranes, or coatings. Never send untrained personnel onto an icy roof. Ground-based roof rakes may be appropriate for some steep residential roofs, but they must be used carefully to avoid damaging roof edges and gutters. For commercial roofs, snow removal should be performed by crews who understand the roofing system, safe access, load distribution, and where drains and penetrations are located.

Ice dams require a different approach. They often form when heat escapes through the attic or upper building envelope, melting snow on the roof. The water then refreezes near colder eaves, creating a dam that forces water back beneath roofing materials. Improving attic insulation and ventilation can reduce this risk, while heat tape may be useful in specific areas when professionally planned and installed. Heat tape is not a substitute for correcting poor drainage, inadequate insulation, or failing roofing materials.

Give Commercial Roofs a Winter Readiness Plan

Commercial properties need a more organized approach because roof problems can interrupt operations, damage equipment, and affect tenants or customers. A winter maintenance plan should identify who inspects the roof after major storms, where roof access equipment is stored, and how drainage issues will be reported.

Facility teams should keep drains, scuppers, and overflow paths visible and accessible. Rooftop HVAC units, skylights, exhaust curbs, and other penetrations deserve special attention because their flashing is often exposed to movement and weather. Any debris left by maintenance crews, such as loose screws, panels, packaging, or tools, should be removed before storms arrive.

It is also wise to document the roof’s condition with photos before winter. This creates a useful baseline if storm damage occurs and supports clear communication with contractors or insurance representatives. For buildings with aging low-slope roofs, preventative maintenance and targeted repairs can help control lifecycle costs while reducing the likelihood of an emergency disruption.

Know When to Call a Roofing Professional

Some winter preparation tasks are reasonable for property owners, such as clearing accessible gutters or checking ceilings for stains. Roof walking, membrane repairs, flashing work, electrical heat tape installation, and snow removal at height are different. They carry fall risks and can cause expensive damage when handled incorrectly.

Call a roofing professional if you see recurring leaks, sagging roof areas, damaged flashing, ponding water, widespread shingle loss, interior moisture, or ice buildup that returns each winter. A qualified contractor can determine whether the issue is isolated or part of a larger roofing, insulation, ventilation, or drainage problem.

Mountain Valley Roofing helps homeowners and commercial property teams prepare for demanding seasonal conditions with inspections, repairs, maintenance, snow management, insulation, heat tape, and weather-resistant roofing solutions. The right work depends on the roof type, its age, the building’s drainage design, and the conditions it faces each winter.

Set a Post-Storm Inspection Routine

Winter preparation should continue after the first storm. From the ground, look for fallen branches, displaced shingles, overloaded gutters, damaged downspouts, or snow and ice blocking drainage paths. Inside, watch for new staining, drips, or unusual odors in attics and upper floors.

After a significant wind, snow, or rain event, a timely inspection can prevent a manageable repair from becoming a larger restoration project. Keep records of the date, weather conditions, visible concerns, and any photos you take. That simple routine makes it easier to track recurring issues and act quickly when professional service is needed.

A roof that enters winter clean, repaired, properly drained, and professionally evaluated is better positioned to protect the property below it when the weather turns. Preparation is not just seasonal maintenance. It is a practical investment in longer roof life, fewer disruptions, and greater confidence through the toughest months of the year.


Roof Restoration vs Replacement Cost Compared

Roof Restoration vs Replacement Cost Compared

A roof that leaks after a Sierra snowstorm or begins blistering under Nevada sun puts property owners in a difficult position: spend enough to solve the problem correctly, without paying for work the roof does not yet need. The roof restoration vs replacement cost decision is not simply about choosing the lower estimate. It is about the roof’s remaining condition, the building’s needs, and the expected value of the work over time.

For many commercial low-slope roofs and some residential systems, restoration can extend useful service life at a substantially lower upfront cost than a full tear-off. But coatings and restoration systems are not a shortcut for a roof with widespread saturated insulation, failing structure, or damage that has already reached the end of its serviceable life. A thorough inspection is what separates a cost-effective restoration from money spent postponing an inevitable replacement.

Roof Restoration vs Replacement Cost: The Basic Difference

Roof restoration is a process designed to renew an existing roof system rather than remove it. Depending on the roof type and condition, the work may include repairs to seams and penetrations, replacement of damaged sections, cleaning, preparation, and application of a protective coating or restoration membrane. The goal is to restore waterproofing, improve UV resistance, and add years of service without the expense and disruption of a complete tear-off.

Roof replacement involves removing the existing roofing materials, addressing any damaged decking or insulation, and installing a new roofing system. It is a larger investment because it includes more labor, material, disposal, and often more extensive repairs below the roof surface. In return, it provides a reset for a roof system that has suffered broad deterioration.

Restoration generally has a lower upfront cost because the existing roof remains in place. Replacement costs more initially, but it can be the better financial choice when repairs would only treat visible symptoms while deeper problems continue underneath.

What Determines the Cost of Each Option?

No responsible contractor can price a roof accurately from square footage alone. Two buildings with the same roof area can require very different scopes of work. A clean, well-maintained single-ply commercial roof with minor seam issues may be an excellent restoration candidate. Another roof of the same size may have wet insulation, trapped moisture, damaged flashing, and multiple old repairs that make replacement the more reliable path.

For restoration, cost is driven by the existing roof material, surface preparation, repairs required before coating, roof access, drainage conditions, the type of coating or membrane selected, and the desired warranty term. A roof with extensive ponding water or deteriorated penetrations needs corrective work before a restoration system can perform as intended.

Replacement costs depend on tear-off requirements, the number of existing roof layers, disposal, deck repairs, insulation upgrades, slope and access, skylights or rooftop equipment, and the selected system. Shingle, metal, torch down, and single-ply membrane roofs each have different material and installation requirements. A building occupied during construction may also require added planning to protect operations and minimize disruption.

Weather matters in Nevada and Northern California. Intense UV exposure, wind, snow loads, temperature swings, and ice-related conditions can shorten the life of a roof that was not designed or maintained for the environment. The least expensive system on day one is not always the most cost-effective system over its service life.

When Roof Restoration Delivers the Best Value

Restoration is usually worth serious consideration when the roof is structurally sound, leaks are limited and repairable, and the insulation beneath the membrane remains dry. It is especially useful for commercial properties with low-slope roofs that need renewed waterproofing and better solar reflectivity without the downtime of a major tear-off.

A properly specified coating system can reflect heat, reduce roof-surface temperatures, and help lower cooling demand. That can be particularly valuable for warehouses, retail buildings, multifamily properties, and facilities with large exposed roof areas. The energy benefit varies by building design, insulation, HVAC operation, and coating color, but a reflective roof can support more consistent performance during hot summer months.

Restoration also reduces landfill waste because the existing roof is not removed. For property owners managing several buildings, that lower disruption and controlled capital expense can make it possible to address roofs proactively instead of waiting for a failure.

Still, restoration must start with preparation. Coating over open seams, wet materials, poor drainage, or an uncorrected leak is not restoration. It is a temporary cover that may fail early. The right contractor will identify repair needs, test for moisture where appropriate, and explain what the roof can realistically support.

Signs a Roof May Be a Restoration Candidate

A roof may be suitable for restoration if it has a stable substrate, isolated rather than widespread leaks, limited surface wear, and no evidence of extensive trapped moisture. Aging coatings, minor cracking, seam deterioration, and UV-related surface breakdown can often be addressed before they become full-system failures.

For residential roofs, restoration is more selective. Some metal roofs and certain low-slope systems may benefit from restoration work. Standard asphalt shingle roofs with widespread granule loss, curling, brittle shingles, or multiple active leaks more often require replacement to provide dependable long-term protection.

When Replacement Is the Smarter Investment

Replacement becomes the practical choice when a roof has reached the point where restoration cannot create a reliable system. If moisture has saturated insulation across large areas, the decking is compromised, leaks are recurring in multiple locations, or the roof has too many aging layers, a new roof may prevent years of escalating repair costs.

A full replacement also creates an opportunity to correct issues that restoration cannot solve. This may include improving insulation, upgrading drainage, replacing deteriorated flashing, adding snow retention measures, installing heat tape in vulnerable areas, or choosing a cool roof system suited to the building’s exposure. Those improvements can protect the entire building envelope, not just the roof surface.

For homeowners, replacement may make more sense when the roof is near the end of its expected lifespan or when storm damage has affected a broad area. For commercial owners and facility managers, replacement may be preferable when roof failures threaten inventory, tenant operations, equipment, or business continuity. The cost of water damage and operational disruption can exceed the price difference between a restoration and a new system.

Compare Lifecycle Cost, Not Just the Estimate

The lowest proposal does not always produce the lowest ownership cost. A better comparison considers what each option is expected to deliver over its service life. Ask how long the restoration or replacement is designed to perform, what repairs are included, which conditions are excluded, how drainage is being addressed, and what maintenance will be needed to protect the investment.

A restoration that extends a viable roof for many years can preserve capital for other building priorities. A replacement that eliminates persistent leaks and improves insulation may provide stronger long-term value than repeated repairs and short-term coating applications. The answer depends on condition, not preference.

It is also wise to consider risk. A property with sensitive equipment, finished interiors, high-value inventory, or occupied tenant spaces has less tolerance for a roofing system that is likely to need frequent intervention. In those cases, reliability may carry more value than the initial savings of a limited repair approach.

Start With a Detailed Roof Assessment

The most useful next step is a professional roof inspection that documents current conditions instead of assuming them. A qualified assessment should examine the roof surface, seams, flashing, penetrations, drainage, insulation condition when accessible, and any signs of moisture intrusion or structural deterioration. Photographs and a clear scope of recommended work give owners a sound basis for comparing options.

Mountain Valley Roofing helps property owners evaluate restoration, repair, and replacement options based on climate exposure, roof condition, and long-term performance goals. The recommendation should fit the building, not force every roof into the same solution.

A roof that can be restored should be restored correctly and maintained carefully. A roof that has reached the end of its service life deserves a replacement system built to handle the years ahead.

What Is the Best Roof for Flat Buildings?

What Is the Best Roof for Flat Buildings?

A flat roof is never truly flat. It needs a controlled slope, dependable drainage, and a waterproof system that can handle years of sun, wind, snow, and standing water. The best roof for flat buildings is the one that fits the building’s use, existing roof condition, local weather exposure, and long-term maintenance plan.

For commercial properties and low-slope residential roofs across Nevada and Northern California, a low upfront price rarely tells the whole story. A system that performs well in a mild climate may struggle under intense UV exposure, temperature swings, high winds, or heavy snow loads. The right choice protects the structure, controls energy costs, and reduces the chance of disruptive leaks.

What Makes the Best Roof for Flat Buildings?

The best flat-roof system does three jobs well: it sheds water, resists weather, and remains serviceable over time. Material matters, but installation quality is just as important. Weak seams, poorly detailed penetrations, inadequate edge metal, and clogged drains can compromise even a premium roofing product.

Start with the building itself. A warehouse with large rooftop HVAC units has different needs than a retail center, apartment building, office, or home addition. Foot traffic, rooftop equipment, drainage layout, insulation requirements, and the condition of the existing roof all affect the best path forward.

Climate is another deciding factor. Northern Nevada and Northern California roofs can see blazing summer sun, freezing nights, wind-driven rain, snow accumulation, and rapid shifts between seasons. Roofing materials must expand and contract without opening seams or losing their protective surface.

The Most Reliable Flat Roofing Systems

Several systems can be excellent choices. The right one depends on the property, budget, and expected service life.

TPO Single-Ply Membrane

TPO is one of the most common choices for commercial flat and low-slope roofs. This white, reflective membrane is heat-welded at the seams, creating a continuous waterproof surface. Its reflective finish can reduce heat absorption, which is especially valuable on properties exposed to intense summer sun.

TPO works well for many commercial buildings because it is relatively lightweight, efficient to install, and available in wide sheets that limit the number of seams. It is also compatible with many insulation assemblies, helping improve energy performance.

The trade-off is that TPO performance depends heavily on membrane quality and proper heat welding. Seams, penetrations, and perimeter details must be installed by experienced crews. A roof with frequent foot traffic may also need reinforced walk pads around service areas.

PVC Single-Ply Membrane

PVC is another heat-welded single-ply system and is often selected for buildings where chemical resistance matters. Restaurants, commercial kitchens, manufacturing facilities, and buildings with grease exhaust can benefit from PVC’s resistance to oils and many contaminants.

Like TPO, PVC is typically light colored and reflective, supporting cool-roof performance and helping reduce rooftop heat buildup. Its welded seams offer strong protection against water intrusion when properly installed.

PVC generally costs more than TPO, so it is not always the first choice for every property. However, where chemical exposure or grease is a concern, the higher initial investment can be justified by longer-term protection.

EPDM Rubber Roofing

EPDM is a durable synthetic rubber membrane with a long history in low-slope roofing. It is known for flexibility and for handling temperature movement well. That flexibility can be an advantage in areas that experience cold winters and significant seasonal temperature changes.

Traditional EPDM is black, which absorbs heat. That may be useful in colder settings, but it can increase cooling demands in sunny, hot climates. White EPDM options are available, though system selection should be based on the property’s full energy and weather profile.

EPDM seams are typically bonded with adhesive or tape rather than heat welded. High-quality seam work and regular inspections are essential, particularly on older roofs where seam condition can become a maintenance concern.

Modified Bitumen and Torch Down Roofing

Modified bitumen is a time-tested asphalt-based roofing system that can be installed in multiple layers. It is a strong option for many residential and commercial low-slope applications, particularly where durability and a more traditional roofing assembly are priorities.

Torch down roofing is one installation method for modified bitumen. The material is applied using heat to create a secure bond, producing a tough surface with dependable waterproofing when installed correctly. Other modified bitumen systems are self-adhered or cold-applied, which may be preferable where open-flame application is not appropriate.

A multi-layer system provides redundancy, which can be valuable on roofs with complex details. The trade-off is weight and installation time. Proper drainage remains critical because prolonged ponding water can shorten the life of any asphalt-based system.

Roof Coatings for Restoration

A coating is not a shortcut for a failing roof. But when an existing low-slope roof is structurally sound and leaks are limited, a professionally installed roof coating can restore protection and extend service life without a full tear-off.

Silicone, acrylic, and other commercial coatings can create a reflective, weather-resistant surface that protects the existing roof from UV exposure. A coating restoration can also reduce waste, minimize interruption to building operations, and offer a cost-effective alternative to replacement.

The roof must be cleaned, repaired, and prepared correctly before coating work begins. Wet insulation, deteriorated substrate, widespread membrane failure, or serious drainage problems must be addressed first. A detailed inspection determines whether restoration is a sound investment or whether replacement is the safer choice.

Drainage Can Decide Whether a Roof Succeeds

Water that remains on a low-slope roof for more than a short period deserves attention. Ponding water adds stress to roofing materials, exposes weak seams, and can accelerate deterioration. It may also point to clogged drains, inadequate slope, sagging deck areas, or undersized drainage components.

The best roof for flat buildings includes a drainage plan, not just a membrane choice. Internal drains, scuppers, gutters, crickets, tapered insulation, and overflow provisions should work together to move water off the roof reliably. In snow-prone locations, drainage must also account for meltwater and ice formation.

During a replacement project, improving slope with tapered insulation can solve recurring ponding issues while also increasing thermal performance. That is often a better long-term answer than repeatedly patching the same low area.

Do Not Overlook Insulation and Roof Details

A roofing system is more than its visible surface. Insulation affects energy efficiency, interior comfort, and condensation control. For many commercial buildings, upgrading insulation during reroofing is one of the best opportunities to reduce heating and cooling losses.

Flashings and penetrations deserve the same attention. Pipes, curbs, skylights, vents, parapet walls, drains, and rooftop equipment create transition points where leaks commonly begin. A durable roof system needs properly designed flashing details, secure termination points, and compatible materials throughout the assembly.

If rooftop equipment is serviced regularly, plan for protected access paths. Service technicians can damage a membrane with repeated traffic, dropped tools, or improper equipment placement. Walk pads and clear maintenance routes help prevent avoidable repairs.

How to Choose the Right System for Your Property

Begin with an inspection that evaluates the roof deck, insulation, drainage, membrane condition, flashings, and prior repair history. The goal is to understand why the roof is leaking or aging, not simply cover the symptoms.

Then weigh lifecycle value. A less expensive system may be appropriate for a short-term holding period or a building with limited demands. For an owner planning to keep a property for decades, a higher-performing membrane, improved insulation, and better drainage can produce stronger long-term returns.

Maintenance should be part of the decision. Most flat roofs benefit from scheduled inspections, especially after major storms and before winter. Clearing drains, checking seams, repairing minor damage early, and documenting roof conditions can add years to a system’s useful life.

Mountain Valley Roofing helps property owners evaluate whether repair, restoration, or replacement offers the most practical value for their roof. The recommendation should be based on the building’s actual conditions, not a one-size-fits-all material preference.

A flat roof should be selected for the weather it will face and maintained for the years it needs to serve. When drainage, insulation, detailing, and installation quality are handled correctly, the right system becomes a dependable layer of protection rather than a recurring source of expense.

Insurance Roof Claim Questions to Ask First

Insurance Roof Claim Questions to Ask First

A roof leak after a windstorm, missing shingles, or damage from heavy snow can put a property owner under immediate pressure. The right insurance roof claim questions help protect the building, preserve evidence, and prevent costly mistakes before repairs begin. For homeowners, the concern is often avoiding out-of-pocket surprises. For facility managers and commercial property owners, it is also about limiting downtime, protecting occupants, and maintaining the building envelope.

Insurance policies, coverage limits, and claim procedures vary. Still, a disciplined approach gives you a stronger foundation for every conversation with your carrier, adjuster, and roofing contractor.

Insurance Roof Claim Questions to Ask Your Insurer

Start with your insurer or agent before making assumptions about what the policy will pay. A damaged roof may be covered when the cause is a sudden event, such as wind, hail, fallen debris, or a covered snow-related loss. Wear from age, deferred maintenance, installation defects, and long-term sun exposure are commonly treated differently. In Nevada and Northern California, that distinction matters because roofs regularly face intense UV exposure, high winds, snow loads, temperature swings, and seasonal storms.

Ask whether the reported cause of loss is covered under your specific policy. Then ask whether the roof is insured at replacement cost value or actual cash value. Replacement cost value may pay the eligible cost to restore the roof, subject to policy terms and deductible requirements. Actual cash value typically accounts for depreciation, which can leave a larger portion of the bill with the property owner.

You should also ask whether the policy has a separate wind, hail, named-storm, or percentage deductible. A percentage deductible can be substantially higher than a flat dollar amount, especially on larger homes and commercial buildings. Confirm the deductible in writing and ask how it will be applied to the claim payment.

Other useful questions include whether there are coverage limits for roof surfaces, whether matching materials are covered, and whether code upgrades are included. Local code requirements can affect the cost of a replacement, particularly when damaged materials are removed and current underlayment, ventilation, drainage, fire-rating, or attachment standards apply. Some policies include ordinance or law coverage, while others limit it or require an endorsement.

What Should You Document Before the Adjuster Arrives?

Document conditions as soon as it is safe to do so. Take date-stamped photos and video from the ground, inside the building, and from accessible exterior areas. Capture missing shingles, lifted flashing, dented metal, displaced membrane seams, damaged gutters, stains on ceilings, wet insulation, and any personal property or business contents affected by water.

Do not climb onto a steep, wet, snow-covered, or visibly unstable roof to collect evidence. A professional inspection is safer and provides a clearer assessment of roof conditions, damage patterns, and urgent repair needs. Mountain Valley Roofing can document visible roofing damage and help property owners understand the scope of necessary repairs or replacement work.

Keep records of the storm date, weather alerts, leak reports, maintenance history, temporary repair invoices, and communications with the insurer. For commercial properties, include tenant notices, incident reports, photos of affected equipment, and records of any operational disruption. These details help establish the timeline and show that the owner acted reasonably to protect the property.

Can You Make Temporary Repairs?

Most policies require owners to take reasonable steps to prevent additional damage. That may mean placing a tarp over an exposed area, removing standing water, protecting interior furnishings, or arranging an emergency roof repair. Ask the carrier how it wants temporary mitigation documented and whether it has preferred invoice requirements.

Save all receipts and take photographs before and after temporary work. Temporary repairs should stop active water intrusion, not conceal the damage or substitute for a complete repair plan. On a low-slope commercial roof, for example, a short-term patch may control a leak while a full inspection determines whether the membrane, insulation, flashing, or drainage system has broader storm damage.

Questions to Ask a Roofing Contractor About the Claim

A qualified roofing contractor does more than provide a price. The contractor should identify the affected roofing components, explain what repairs are needed, and distinguish storm-related damage from conditions caused by age or maintenance needs. This is especially valuable when a roof has multiple issues at once.

Ask whether the inspection will include the roof surface, flashings, penetrations, drainage components, skylights, gutters, attic ventilation, and interior signs of water intrusion. For commercial buildings, the assessment should also consider parapet walls, expansion joints, rooftop equipment curbs, drains, scuppers, and the condition of the insulation beneath the membrane.

Ask for a written, line-item estimate that describes materials, labor, tear-off or disposal, decking repairs if needed, flashing work, and temporary protection. A clear scope makes it easier to compare the contractor’s findings with the insurer’s estimate. It also reduces confusion when supplement requests are necessary because concealed damage, code requirements, or omitted components become apparent.

Be cautious of anyone who promises to waive your deductible or guarantees a specific settlement amount. The deductible is part of the insurance contract, and the final coverage decision belongs to the insurer. A dependable contractor can provide documentation, answer technical roofing questions, and perform the approved work correctly, but should not misrepresent damage or pressure you to sign before you understand the scope.

How Do You Compare the Insurance Estimate With the Roof Estimate?

The insurer’s estimate and the contractor’s estimate may not match at first. That does not automatically mean either one is wrong. The adjuster may have inspected before hidden damage was visible, may not have included all roof components, or may have used a scope that differs from the contractor’s recommended system.

Compare the documents line by line. Look at roof area measurements, material type, removal and disposal, underlayment, flashing, ridge or hip components, ventilation, gutters, decking, permits, and code-related work. On flat and low-slope roofs, compare membrane type, insulation thickness, edge metal, drains, penetrations, and the details around transitions. Small omissions can create a major gap in the finished project.

If the roofing inspection identifies conditions not included in the initial claim estimate, ask the contractor for photographs, measurements, and a written explanation. Submit that information to the carrier and ask about the supplement process. Keep communication factual and organized. A well-supported request is more productive than a vague disagreement over price.

When Should Repairs Begin?

Emergency mitigation should begin promptly when the roof is allowing water into the building. Permanent repairs or replacement often require a clearer agreement on scope, payment, and material selection. The right timing depends on the severity of the damage, weather exposure, the building’s use, and the insurer’s process.

For a home with an active leak, waiting through another storm can increase interior damage and mold risk. For a commercial facility, delaying work can disrupt tenants, inventory, equipment, and daily operations. At the same time, starting a full replacement before the scope is documented can make it harder to show the original damage. Get the damage recorded, make necessary temporary repairs, and maintain written records of each decision.

Ask the contractor how the proposed roof system will perform beyond the claim. A replacement is an opportunity to improve long-term weather resistance, drainage, ventilation, energy efficiency, and maintenance access. In high-sun areas, reflective cool roof options or appropriate coatings may reduce heat gain on eligible roof types. In snow-prone areas, proper flashing, drainage, insulation, and snow-management details can reduce future vulnerability.

Final Questions Before You Approve Work

Before approving the project, confirm the final scope, materials, workmanship warranty, payment schedule, expected schedule, site protection plan, and cleanup responsibilities. Ask how changed conditions will be handled if damaged decking, dry rot, wet insulation, or other concealed issues are found during the work.

For commercial properties, also clarify staging, access routes, occupant safety, noise, odor, parking impacts, and how the contractor will protect rooftop equipment and interior operations. A good plan should solve the immediate claim-related damage without creating avoidable disruption for the people who use the building.

A roof claim is easier to manage when the facts are documented early and every party works from a clear scope. Focus first on stopping additional damage, then choose repairs that give your property the durable protection it needs for the next storm.

What Causes Roof Dry Rot? 7 Common Problems

What Causes Roof Dry Rot? 7 Common Problems

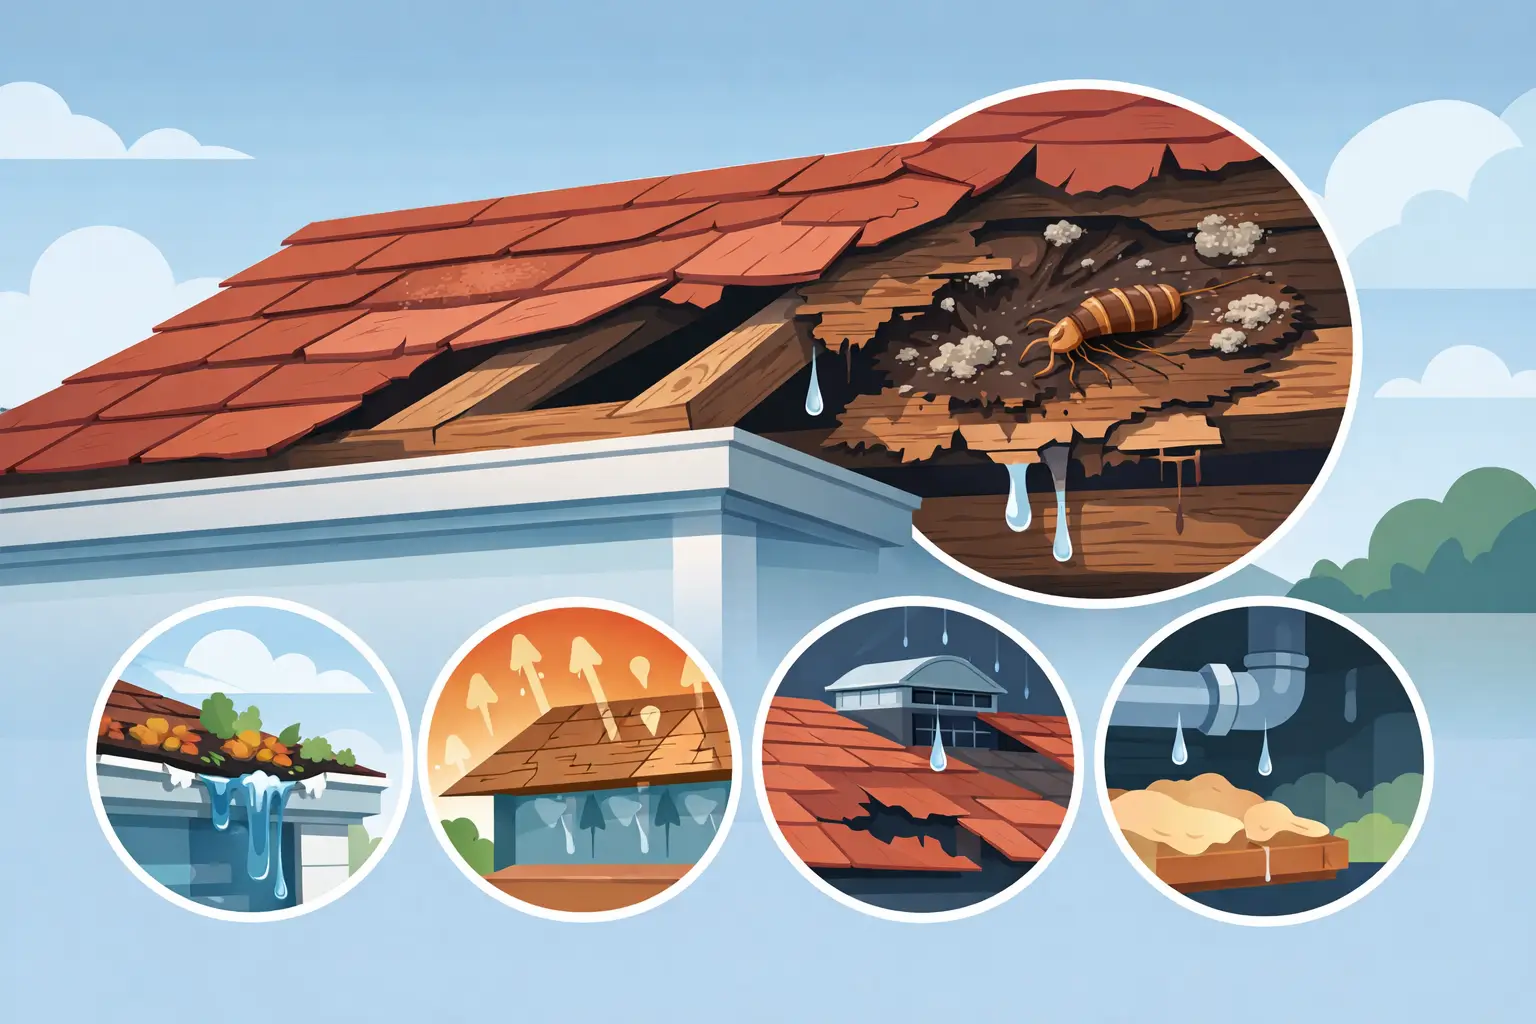
A roof can look sound from the street while moisture is quietly damaging the wood beneath it. So, what causes roof dry rot? Despite the name, dry rot begins with moisture. Water gets into framing, decking, fascia, or trim, then fungi feed on the wood fibers and leave them brittle, cracked, and weak. Left alone, a small leak can become a structural repair.

For homes and commercial buildings in Nevada and Northern California, the risk often comes from a combination of intense sun, wind-driven rain, snow, ice, and large temperature swings. The right repair is not simply replacing damaged wood. It means finding and correcting the path that allowed moisture in.

What Causes Roof Dry Rot?

Roof dry rot occurs when wood stays damp long enough for decay fungi to grow. The fungi break down the structural components that give wood its strength. As the material deteriorates, it may appear darker than surrounding wood, crumble at the edges, split into block-like pieces, or feel soft when probed.

Wood does not have to be soaking wet for this process to start. Repeated wetting, slow drying, and poor ventilation can create the conditions decay needs. A roof leak that only appears during heavy storms can still be enough to damage the roof deck or rafter tails over time.

The most common causes are failed waterproofing details, aging roofing materials, clogged drainage, and moisture trapped in poorly ventilated roof areas. Each can be manageable when addressed early. When ignored, several problems often overlap.

1. Leaks Around Flashing and Penetrations

Flashing is the metal or membrane material that seals transitions around chimneys, skylights, vents, walls, valleys, and other roof penetrations. These areas move differently than the surrounding roof surface as temperatures change. Sealants can crack, fasteners can loosen, and flashing can corrode or pull away.

A failure at one of these details may allow water behind the roofing system without producing an obvious ceiling stain right away. Water can travel along the roof deck or framing before it reaches an interior surface. By the time a stain appears, dry rot may already be developing around the original entry point.

Skylights deserve special attention. Their curb flashing and surrounding roofing must be integrated correctly, not merely sealed at the edges. A skylight that leaks intermittently can damage sheathing and framing long before the glass or interior finish shows a clear warning.

2. Damaged, Worn, or Missing Roofing Materials

Shingles, tiles, metal panels, low-slope membranes, and torch down systems all protect the building by shedding water. When materials crack, blow off, separate at seams, or lose their protective surface, water can reach the underlayment and wood below.

Nevada and Northern California roofs face demanding exposure. Strong UV rays can dry out and age roofing materials. High winds can lift edges and drive rain under vulnerable areas. Winter snow and ice can hold moisture at eaves and valleys. The damage may begin as a few loose shingles or a small membrane split, but the framing below pays the price if repairs are delayed.

The trade-off is straightforward: spot repairs are cost-effective when the roof system is generally in good condition. If failures are widespread or the roof is near the end of its service life, repeated patches may not provide dependable long-term protection.

3. Clogged Gutters and Poor Roof Drainage

Roof water needs a clear route off the building. When gutters, downspouts, scuppers, or drains clog, water can back up beneath roof edges or pond on low-slope surfaces. Overflow repeatedly wets fascia boards, soffits, rafter tails, and exterior wall intersections.

On a residential roof, rotted fascia is often an early sign that gutter maintenance or edge flashing needs attention. On commercial roofs, ponding water can stress seams, penetrations, and drainage components. A flat or low-slope roof should not be assumed to have a drainage problem just because water remains after a storm, but standing water that persists for more than a couple of days warrants professional evaluation.

Cleaning gutters matters, but it is not always the complete fix. Gutters may be undersized, improperly pitched, or missing adequate downspout capacity. Roof drains can also be blocked below the surface where a quick visual check will not reveal the issue.

4. Ice Dams and Snow Accumulation

In higher elevations and colder parts of the region, snow-related moisture can be a major contributor to roof dry rot. An ice dam forms when snow melts on a warmer upper roof area and refreezes near the colder eaves. The resulting ridge can trap meltwater, forcing it under shingles or other roofing materials.

This is not only a roofing problem. Heat loss from the building, insufficient attic insulation, inadequate ventilation, and air leaks around ceiling penetrations can all contribute. Simply removing visible ice may reduce immediate pressure, but it does not correct the underlying condition.

Safe snow removal and properly installed heat tape can help in certain situations. They should be part of a plan based on the roof design, insulation levels, drainage, and local snow load, not a one-size-fits-all response.

5. Poor Attic Ventilation and Interior Moisture

Not every source of roof moisture comes from above. Warm, humid indoor air can rise into an attic or roof cavity through unsealed openings around lights, plumbing stacks, ductwork, and access hatches. When that air meets cold roof decking, condensation can form on the underside of the wood.

Over time, condensation can support fungal growth even if the outer roof covering is intact. Bathrooms, kitchens, laundry areas, and improperly vented exhaust fans are common contributors. In commercial properties, roof cavities above high-humidity operations may need special consideration.

Ventilation helps remove moisture, but it must be designed with the insulation and air-sealing strategy. Adding vents without addressing interior air leaks may not solve the problem. A professional inspection can distinguish a roof leak from condensation damage, which is essential because the repairs are different.

6. Aging or Improperly Installed Underlayment

Underlayment is the secondary water-shedding layer beneath the visible roof covering. It provides valuable protection when wind-driven rain gets past shingles, tiles, or panels. If it has deteriorated, was installed with poor overlaps, or was punctured during installation, water can reach the deck even when the exterior covering appears mostly intact.

Installation details matter at roof edges, valleys, sidewalls, and penetrations. These locations receive concentrated water flow and need materials suited to their exposure. A low initial installation cost can become expensive if critical waterproofing details were skipped or installed incorrectly.

This is one reason repairs should begin with an inspection rather than an assumption. Replacing a few visible shingles without evaluating the underlayment and surrounding deck can conceal the symptom while leaving the cause in place.

7. Delayed Repairs After Storm Damage

Wind, hail, fallen branches, and debris can create openings that are easy to overlook. A lifted shingle, dented flashing edge, punctured membrane, or displaced ridge cap may not cause an immediate leak during dry weather. The next storm can turn that minor damage into a recurring moisture source.

Prompt documentation and temporary protection are especially valuable after a storm. For property owners working through an insurance claim, clear inspection findings can help identify storm-related damage and support a practical repair scope. The priority is preventing additional water intrusion while the permanent repair is planned.

Signs That Roof Dry Rot May Be Present

Dry rot is often hidden, but certain warning signs deserve attention. Watch for soft or flaking fascia, peeling paint near roof edges, sagging roof areas, recurring leaks, musty attic odors, discolored sheathing, or gutters pulling away from the building. Indoors, water stains and cracked drywall can indicate a roof issue, though plumbing or condensation may also be responsible.

A roof that feels spongy when walked on should be treated seriously. Do not climb onto a questionable roof or attempt to probe damaged decking from above. Decayed sheathing may not support weight safely.

How Professionals Repair and Prevent Further Decay

A durable repair starts by locating the moisture source. The affected roofing materials are removed as needed, the deck and framing are inspected, and decayed wood is replaced with sound material. The surrounding waterproofing details must then be rebuilt so water is directed away from the repair.

The scope depends on what is damaged. Localized rot at a fascia board may require carpentry, gutter corrections, and edge flashing work. Extensive deck decay below an aging roof may make a larger replacement or restoration project the better value. Commercial buildings may also benefit from drainage improvements, seam repairs, or a coating system when the existing roof is a suitable candidate.

Preventive maintenance is the practical way to control this risk. Seasonal inspections, gutter and drain cleaning, prompt storm repairs, and attention to attic moisture can extend roof life and reduce the chance of hidden wood damage. Mountain Valley Roofing evaluates both the roofing system and the surrounding building details so repairs address the cause, not just the visible rot.

When water finds a way into a roof, time works against the structure. Scheduling an inspection after recurring leaks, storm damage, or visible wood deterioration gives you the best chance to make a focused repair before a manageable issue turns into major reconstruction.

Skylight Replacement Cost: What to Expect

Skylight Replacement Cost: What to Expect

A leaking skylight can stain drywall long before it reveals the real problem: failed flashing, a cracked dome, worn seals, or aging roofing around the opening. Skylight replacement cost is not just the price of a new unit. It includes the work required to rebuild a weather-tight connection between the skylight and your roof.

For homeowners in Nevada and Northern California, that connection has to stand up to intense UV exposure, high winds, winter snow, and sharp temperature swings. A low upfront price can become expensive if the installer cuts corners on flashing, underlayment, or interior repairs.

Typical Skylight Replacement Cost

Most residential skylight replacements fall between $1,200 and $3,500 installed when the existing opening can be reused and the surrounding roof is in good condition. A basic fixed skylight near an accessible roof area generally costs less than a larger venting model, a solar-powered unit, or a replacement that requires roof and ceiling modifications.

More complex projects can run $3,500 to $6,000 or more. That range is common when there is water damage, dry rot around the curb, difficult roof access, steep slopes, specialty glazing, or a need to replace shingles, tile, metal panels, or low-slope roofing around the unit.

A skylight may look like a simple window in the roof, but it is part of the roofing system. The most reliable estimate accounts for the skylight, compatible flashing, waterproofing materials, labor, disposal, and any repair work uncovered after the old unit is removed.

Replacement costs by skylight type

Fixed skylights are usually the most cost-effective option. Because they do not open, they have fewer moving parts and fewer potential points of air or water intrusion. They work well in hallways, stairwells, living rooms, and other areas where added daylight is the main goal.

Manual venting skylights cost more because they include an operable sash and hardware. Electric or solar-powered venting models add further cost, but they can improve ventilation in kitchens, bathrooms, and upper-level rooms where heat gathers. Some models include rain sensors that close the skylight automatically when weather moves in.

Tubular skylights, also called sun tunnels, are often less expensive than full skylights and can be a practical choice for smaller interior spaces. However, their cost still depends on the length and path of the tube, attic conditions, roof material, and ceiling finish.

Commercial curb-mounted skylights, smoke vents, and larger roof daylighting systems require a separate evaluation. On low-slope roofs, the curb, membrane tie-in, drainage pattern, and warranty requirements all affect the scope and price.

What Drives Skylight Replacement Pricing?

The unit itself matters, but it is only one part of the budget. The condition of the roof assembly and the details around the opening often determine whether a project stays straightforward or becomes a repair-focused job.

Roof material and flashing requirements

Shingle roofs typically allow for a more direct replacement when the surrounding shingles are still serviceable. Tile, slate, standing-seam metal, and some specialty roofing systems require more labor to remove and reinstall materials without causing damage or compromising water shedding.

Proper flashing is not optional. A skylight needs a flashing system designed for its size, roof pitch, and roofing material. The installer should also use appropriate underlayment and ice-and-water protection where climate conditions call for it. In snow-prone areas, these details help manage meltwater that can work beneath roofing materials.

Roof access, slope, and height

A one-story home with a moderate-pitch roof is easier and safer to work on than a steep, two-story roof with limited access. Labor costs rise when crews need additional safety equipment, roof protection, staging, or more time to move materials.

The skylight’s location matters as well. A unit near a ridge may be easier to integrate than one located in a roof valley or near a transition where water naturally concentrates. In those higher-risk areas, a contractor may recommend changes that improve drainage and long-term performance.

Water damage and structural repairs

A leak does not always mean the skylight glass has failed. Sometimes the issue is deteriorated flashing or roofing beyond its service life. Other times, recurring moisture has damaged the roof deck, framing, insulation, drywall, trim, or paint.

Replacing the skylight without repairing damaged wood can leave the roof vulnerable. Dry rot repair and carpentry add to the project cost, but they restore the strength needed to secure the new unit and prevent a temporary fix from becoming another leak.

Glass, efficiency, and operating features

Modern skylights are available with insulated glass, low-E coatings, laminated safety glass, tinted glazing, blinds, and impact-resistant options. These upgrades can raise the initial price, yet they may reduce glare, limit solar heat gain, improve comfort, and provide better protection during severe weather.

For homes exposed to strong summer sun, glazing selection deserves careful attention. The brightest option is not always the most comfortable one. A properly selected energy-efficient skylight can bring in daylight without turning the room below into a heat trap.

When Replacement Makes More Sense Than Repair

Minor issues can sometimes be repaired. Loose interior trim, a small flashing defect, or a blocked drainage channel may not require a new skylight. A professional inspection is the best way to identify the source before work begins.

Replacement is often the better long-term value when the skylight is old, the glazing is fogged between panes, the frame is cracked or warped, seals have failed, or leaks keep returning after prior repairs. It is also worth considering during a full roof replacement. Installing a new skylight while the roofing materials are already removed can reduce duplicate labor and create a cleaner waterproofing transition.

Avoid relying on caulk or roof cement as a permanent answer to a leaking skylight. Those materials may slow down a leak for a short time, but they do not correct failed flashing, deteriorated roofing, or a damaged skylight frame.

How to Get an Accurate Skylight Replacement Estimate

A reliable estimate starts with an on-roof inspection, not a guess based on the skylight’s interior dimensions. The contractor should inspect the unit, flashing, roof covering, underlayment, drainage areas, and attic or ceiling conditions where accessible.

Ask whether the quote includes removal and disposal of the old skylight, replacement flashing, underlayment, matching roof materials, and interior finish repairs if needed. If the work involves a venting unit, clarify whether electrical work, controls, blinds, or rain sensors are included.

It also helps to ask how the contractor will protect the opening if weather changes during the project. A prepared crew has a plan for temporary dry-in, especially in mountain and high-desert climates where conditions can shift quickly.

The lowest quote may exclude essential components that show up later as change orders. Compare scopes of work, materials, warranty coverage, and the contractor’s experience with your specific roofing type. The goal is not simply to replace glass overhead. It is to restore a durable, weather-resistant roof system around it.

Planning for Long-Term Value

If your roof is nearing the end of its service life, discuss the skylight and roof together. A new skylight installed into aging shingles or a deteriorating low-slope membrane may need to be removed again when the roof is replaced. Coordinating the work can save labor and reduce the chance of future leaks.

Maintenance also protects the investment. Keep roof valleys and skylight areas clear of debris, watch for interior staining after storms, and schedule a roof inspection when you notice condensation, drafts, or discoloration around the opening. Early action is usually less costly than repairing widespread moisture damage.

Mountain Valley Roofing approaches skylight replacement as roofing work first and window work second. The right unit, flashing system, and installation details should protect the building through heat, wind, snow, and seasonal weather changes. A careful inspection and a complete scope give you the information needed to choose a solution built to last.

Best Commercial Roof Coatings for Harsh Climates

Best Commercial Roof Coatings for Harsh Climates

A commercial roof can look serviceable from the ground while UV exposure, open seams, aging flashings, and standing water are steadily shortening its life. The best commercial roof coatings create a protective, seamless surface over an eligible existing roof, helping building owners control repair costs, reduce heat gain, and postpone a full replacement. The key word is eligible. A coating performs well only when it is matched to the roof’s condition, material, drainage, and the climate it must withstand.

For commercial properties across Nevada and Northern California, that climate can include intense summer sun, high winds, winter snow, freezing nights, and rapid temperature swings. Selecting a coating based on price alone can lead to premature wear. Selecting the right system can add years of weather-resistant service to a roof that still has sound structure and dry insulation.

What Makes the Best Commercial Roof Coatings Different?

Commercial roof coatings are liquid-applied systems that cure into a continuous membrane. Unlike a new roof installation, a restoration coating can often be installed with less tear-off, less disruption, and less material sent to the landfill. It seals many small surface flaws while reinforcing vulnerable details around penetrations, drains, curbs, and parapet walls.

The best system is not simply the whitest coating or the thickest application. It is the coating that adheres to the existing substrate, handles the building’s drainage conditions, and holds up under expected foot traffic and weather. Proper preparation matters just as much as the product. The roof must be cleaned, repaired, dried, and primed where required before coating begins.

A quality restoration should also address the full roof assembly. Loose seams, deteriorated flashing, rusted metal, soft decking, and trapped moisture need correction first. A coating can restore a weathered roof surface. It cannot repair structural damage or make wet insulation perform like new.

Comparing the Best Commercial Roof Coating Types

Most commercial coating projects use silicone, acrylic, polyurethane, or asphalt-based systems. Each has a useful role, but their strengths are different.

Silicone coatings for ponding water and UV exposure

Silicone is often a strong option for low-slope roofs where ponding water is a recurring concern. It offers excellent UV resistance and generally maintains its performance when water remains on the roof after storms or snowmelt. This makes it particularly useful when drainage improvements are limited or cannot be completed immediately.

The trade-off is surface cleanliness and future recoating considerations. Silicone can attract dirt over time, which may reduce reflectivity, and some future coating applications require specialized preparation to achieve reliable adhesion. It is still a practical long-term choice when water resistance is the main priority.

Acrylic coatings for energy efficiency and value

Acrylic coatings are water-based, reflective, and often cost-effective for roofs with positive drainage. Their bright white finish can reflect a significant amount of solar heat, helping reduce rooftop temperatures and cooling demand during hot Nevada summers.

Acrylic systems are usually not the first choice for roofs with persistent ponding water or locations where cold, wet installation conditions are expected. They need appropriate drying conditions during application and perform best when the roof drains properly. For a well-maintained metal roof or a smooth low-slope membrane with good drainage, acrylic can deliver strong energy-efficient value.

Polyurethane coatings for traffic and impact resistance

Polyurethane coatings are known for toughness. They are often selected for roofs exposed to regular service traffic, hail concerns, or physical wear around mechanical equipment. Some systems use a durable base coat with a UV-resistant topcoat, giving the roof both strength and lasting surface protection.

These coatings can cost more than acrylic options, but they may be the better investment for a facility with technicians regularly accessing HVAC units or other rooftop equipment. A tough coating does not eliminate the need for walk pads and careful maintenance, but it provides a more durable surface where activity is unavoidable.

Asphalt-based and specialty coating systems

Asphalt-based coatings can be appropriate for certain built-up roof and modified bitumen applications, particularly where compatibility with the existing roof system is a priority. Specialty products may also be used for metal roofs, spray polyurethane foam, or specific membrane types.

The right choice depends on the substrate and the manufacturer’s approved application requirements. Coating compatibility should never be assumed. A professional inspection and adhesion testing help confirm that the proposed system will bond as intended.

Match the Coating to the Existing Roof

The existing roof material is one of the first factors to evaluate. Metal roofs often benefit from coatings that address oxidation, fastener areas, seams, and thermal movement. Single-ply roofs such as TPO, PVC, and EPDM require careful cleaning, primers, and product selection because their surfaces and chemical compositions vary.

Modified bitumen and built-up roofs may be good restoration candidates when the membrane remains secure and the roof is not holding damaging moisture below the surface. Spray polyurethane foam roofs also need a protective coating maintained at the right thickness to prevent UV degradation.

Roof age alone does not decide whether restoration is possible. A ten-year-old roof with neglected seams and wet insulation may require more extensive work than an older roof that has been maintained consistently. The better question is whether the roof assembly is dry, stable, and repairable enough to support a coating system.

Climate, Drainage, and Building Use Should Drive the Decision

A coating that performs well in a mild, dry market may not be the right fit for a mountain property or a high-desert commercial building. Northern California sites may face snow loads, freeze-thaw cycles, and moisture that demand careful flashing details. Nevada properties often deal with severe UV exposure and high rooftop temperatures that can accelerate surface aging.

Drainage deserves special attention in both regions. Even a coating designed to resist ponding water cannot correct a roof that is structurally sagging or poorly sloped. If water consistently collects near drains, scuppers, or equipment curbs, repairs or drainage improvements may be needed before restoration.

Building use matters as well. A warehouse with limited rooftop access has different coating needs than a medical facility, apartment complex, or retail center with multiple service contractors on the roof. Service traffic, grease exhaust, nearby trees, and rooftop equipment all affect coating selection and maintenance planning.

Installation Quality Determines Coating Performance

Even the best commercial roof coatings will fail early if surface preparation is rushed. A professional crew starts with a detailed inspection to identify leaks, membrane splits, deteriorated sealants, loose fasteners, rust, and moisture concerns. The roof is then cleaned and allowed to dry thoroughly. Repairs, reinforcement fabric, primers, and detail work are completed before the field coating is applied.

Application thickness must meet the specified dry-film requirement. Thin spots around penetrations and transitions are common failure points, which is why experienced crews pay close attention to these areas. Weather also matters. Temperature, humidity, wind, and the chance of rain affect cure time and application quality.

A written scope should identify the coating system, required preparation, repair allowances, reinforcement details, and warranty terms. If a proposal only promises to “coat the roof” without addressing these items, it leaves too much room for costly shortcuts.

Protect the Investment With Maintenance

A restored roof still needs routine care. Semiannual inspections, debris removal, drain cleaning, and prompt repairs protect the coating and help preserve warranty coverage. After major wind, hail, or snow events, an inspection can catch damage before water reaches insulation or interior spaces.

Facility managers should also control rooftop access. Requiring service vendors to use designated walk paths and report accidental damage prevents small punctures from becoming active leaks. Maintenance is less expensive than emergency response, especially when a leak threatens inventory, equipment, or tenant operations.

The right coating is not a generic product decision. It is a restoration strategy built around the roof you have, the weather it faces, and the years of service you need from it. Mountain Valley Roofing can evaluate those conditions, identify whether restoration is practical, and recommend a coating system designed to protect the property without paying for replacement before it is necessary.

Torch Down Roofing Guide for Lasting Protection

Torch Down Roofing Guide for Lasting Protection

A low-slope roof can look simple from the ground, but it has one demanding job: keep water out despite standing moisture, intense sun, wind, and sharp temperature swings. This torch down roofing guide explains why modified bitumen remains a trusted choice for many commercial properties and residential flat-roof sections across Nevada and Northern California – and why qualified installation matters as much as the material itself.

What Is Torch Down Roofing?

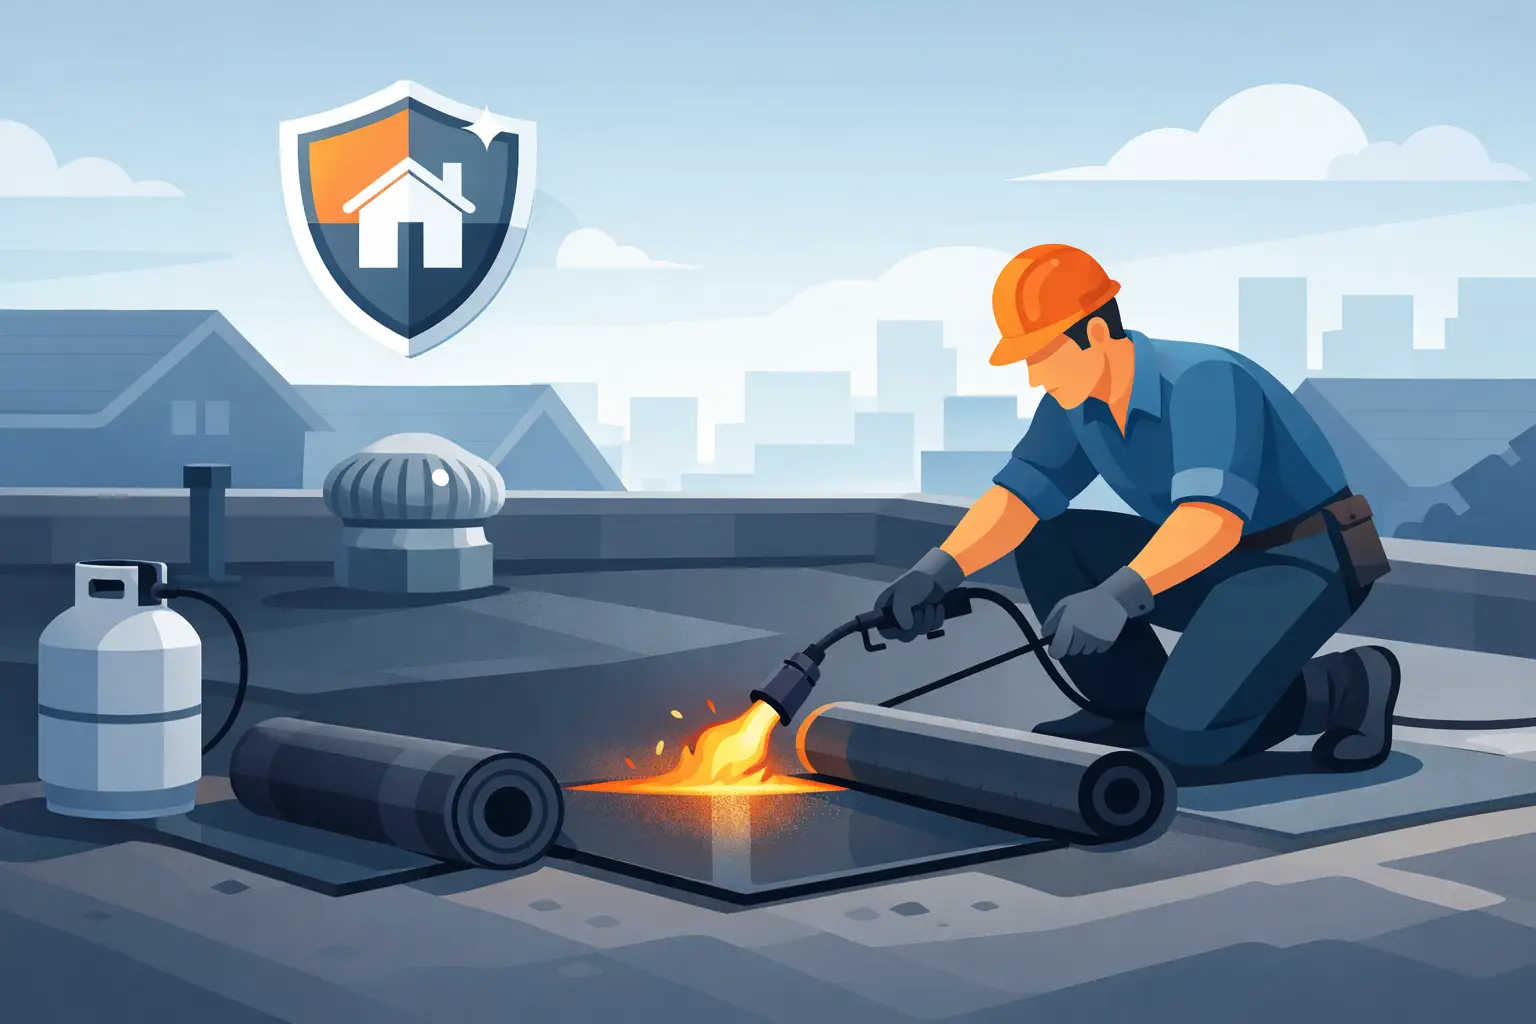
Torch down roofing is a modified bitumen membrane system designed for low-slope and flat roofs. The membrane is manufactured in rolls and applied in overlapping layers. During installation, a trained roofing crew uses a propane torch to heat the underside of the membrane, bonding it directly to the prepared roof surface or an underlying base sheet.

The heat creates a strong, continuous bond at the seams, which are often the most vulnerable areas on low-slope roofs. Once properly installed, the finished roof forms a durable waterproof barrier that resists rain, wind, and daily exposure.

Modified bitumen is asphalt-based, but it is reinforced and improved with polymers for greater flexibility and strength. Two common formulations are APP and SBS. APP membranes are typically installed with a torch and perform well under UV exposure. SBS membranes are more rubber-like and flexible, which can be valuable where a roof experiences movement or colder conditions. The right system depends on the building, roof design, local climate, and budget.

Why Property Owners Choose Torch Down Roofing

Torch down roofing has earned its place because it solves practical problems on low-slope roof areas. It is commonly used on commercial buildings, multifamily properties, garages, patio covers, additions, and residential roof sections that do not have enough pitch for conventional shingles.

A properly specified system offers strong waterproofing because its seams are heat-welded rather than simply adhered. It also stands up well to foot traffic when maintenance crews need rooftop access for HVAC equipment, drains, solar components, or other building systems. That durability can be especially useful for commercial properties where access and service activity are routine.

UV resistance is another important advantage in high-sun areas. A granulated cap sheet can shield the membrane from sunlight and physical wear. Reflective cap-sheet options may also help reduce surface temperatures and support better energy performance. However, reflectivity varies by product and color, so it should be evaluated as part of the full roofing specification rather than assumed.

Torch down systems are also repairable. A skilled roofer can often address localized damage, worn flashings, or small seam concerns without replacing the full roof. That does not mean every aging roof is a repair candidate. If moisture has spread beneath the membrane or the roof has reached the end of its service life, replacement may provide the better long-term value.

Where Torch Down Roofing Works Best

Torch down roofing performs best on low-slope applications with positive drainage and a sound roof assembly beneath it. The roof does not have to be perfectly flat, but it must be designed to move water toward drains, scuppers, or gutters. No roofing material benefits from water sitting in the same area for extended periods.

For a small residential addition or detached garage, a modified bitumen roof can provide reliable weather protection with a clean, low-profile appearance. On commercial buildings, it can be a practical option for select roof areas, especially when durability, repairability, and a proven installation method are priorities.

Still, it is not automatically the best answer for every low-slope roof. Single-ply systems such as TPO or PVC may be better suited to large commercial roofs where highly reflective surfaces, broad sheet widths, or particular chemical-resistance needs are part of the decision. Roof coatings can be cost-effective when an existing roof is still structurally sound and qualifies for restoration. A professional inspection should identify whether repair, restoration, or replacement will deliver the strongest lifecycle value.

A Torch Down Roofing Guide to Installation Quality

The term “torch down” can make the process sound straightforward. It is not a do-it-yourself project. Open-flame application near roof decking, walls, vents, and flashing details requires trained installers, proper fire-safety procedures, and close post-work inspection.

A durable installation begins with substrate preparation. The deck or existing approved roof surface must be clean, dry, stable, and properly sloped. Rotten decking, loose materials, trapped moisture, and poor drainage must be corrected before new membrane is installed. Covering these problems only hides them temporarily.

The roofing crew then installs the appropriate base layer, insulation, or separation components required by the system design. Membrane rolls are carefully aligned, heated, and overlapped to create fully bonded seams. Flashings at walls, curbs, pipes, drains, and roof edges receive special attention because these transitions are common leak locations.

After application, experienced crews inspect seam bleed-out, edge details, penetrations, and the entire work area. Fire watches are a critical part of responsible torch-applied roofing. The crew checks for signs of smoldering after work is complete, particularly around concealed wood components and wall transitions.

The workmanship behind these details directly affects roof life. A lower initial price is not a savings if it comes from skipped preparation, inadequate flashing, or an installer who treats the roof as a simple roll-and-torch job.

Maintenance That Protects the Investment

Even a well-installed torch down roof needs routine attention. Maintenance is how property owners catch small issues before insulation, decking, interiors, or inventory are affected.

Schedule inspections at least twice a year, as well as after severe wind, heavy snow, hail, or major storms. On commercial buildings, roof inspections should also follow work by other trades. A technician servicing an HVAC unit can accidentally damage a membrane, loosen a flashing, or leave debris that blocks drainage.

During an inspection, look for cracked or lifted flashing, open seams, blisters, punctures, exposed reinforcement, granule loss, and ponding water that remains long after rainfall. Keep drains, scuppers, gutters, and downspouts clear. Branches, loose equipment, and stored materials should not sit directly on the membrane.

Avoid allowing untrained personnel to apply caulk or patch products as a permanent fix. Some materials do not adhere correctly to modified bitumen, and a poorly placed patch can direct water beneath the roof surface. Prompt professional repairs are usually more affordable than waiting for a stain on the ceiling.

Cost, Service Life, and the Factors That Change Both

Torch down roofing costs vary widely based on roof size, access, tear-off requirements, insulation needs, deck repairs, membrane thickness, flashing complexity, and local code requirements. A simple, open roof costs less to complete than a roof with numerous penetrations, parapet walls, rooftop equipment, and deteriorated substrate.

Service life also depends on the system selected and how the roof is maintained. Quality materials and proper installation can provide long-lasting performance, but severe sun exposure, standing water, neglected drains, and repeated foot traffic can shorten that lifespan. A maintenance plan helps protect the investment and gives property owners a documented record of the roof’s condition.

For facilities managers, the decision should focus on total cost of ownership, not installation cost alone. A roof that reduces leaks, avoids operational interruptions, and can be repaired effectively may deliver more value over time than a cheaper system with limited durability.

When to Call a Roofing Professional

Call for an inspection if you see active leaks, interior staining, bubbling membrane, loose edge metal, recurring ponding water, or damaged areas around rooftop equipment. The sooner these concerns are evaluated, the more options may be available. Early repair can prevent the moisture damage that turns a manageable roofing issue into a full replacement project.

Mountain Valley Roofing evaluates low-slope roofing systems with the region’s weather in mind, from harsh summer UV exposure to wind, snow, and freeze-thaw conditions. The goal is not to force one material onto every building, but to recommend a system that protects the property and supports its long-term budget.

A torch down roof is most reliable when it is treated as a complete system: sound deck, proper drainage, compatible materials, skilled flashing work, and regular maintenance. Give those details the attention they deserve, and the roof can provide dependable protection long after the installation crew leaves.

How to Choose a Roofing Contractor With Confidence

How to Choose a Roofing Contractor With Confidence

A roof leak after a windstorm, cracked shingles under intense sun, or ponding water on a commercial roof can make any contractor who answers the phone seem like the right choice. But knowing how to choose a roofing contractor before work begins can protect your property, budget, and peace of mind for years. The right company does more than install materials. It evaluates the full roofing system, recommends a solution that fits local conditions, and stands behind the work when weather puts that system to the test.

For property owners in Nevada and Northern California, that standard matters. Roofs in this region may face high UV exposure, strong winds, snow loads, freeze-thaw cycles, wildfire-related debris, and major temperature swings. A low bid that overlooks those demands can become an expensive repair cycle.

Start With Local Experience and Proper Credentials

A roofing contractor should be properly licensed for the work and location, insured, and established enough to provide a clear business address, phone number, and record of completed projects. Ask for proof of general liability insurance and workers’ compensation coverage. These are not formalities. If a worker is injured or surrounding property is damaged, inadequate coverage can create a serious risk for the owner.

Local experience is equally valuable. A contractor familiar with Northern Nevada, the Sierra region, and Northern California understands that a roof system must be selected for more than appearance. Material expansion, drainage, ventilation, snow retention, wind exposure, and UV resistance all affect long-term performance.

For example, a dark shingle may not be the best fit for every high-sun location, while a cool roof coating or reflective membrane may help reduce heat gain on the right commercial building. In mountain areas, snow management and ice prevention may be as important as the roofing material itself. Ask contractors how their recommendations account for your property’s climate, roof slope, drainage pattern, and exposure.

Ask for an Inspection, Not a Guess

A dependable roofing contractor should inspect the roof before recommending repair, restoration, or replacement. Be cautious when a company offers a firm price or declares that a full replacement is necessary without examining the roof surface, flashing, penetrations, drainage, and underlying structure.

For homes, the inspection should consider shingles or other surface materials, valleys, flashing around chimneys and vents, attic ventilation, decking condition, and signs of moisture intrusion. On commercial properties, the scope should also address seams, membrane condition, edge metal, drains, scuppers, rooftop equipment, ponding water, and insulation where applicable.

A thorough assessment can reveal options that a quick estimate misses. A roof with localized damage may need a targeted repair. An aging low-slope roof with a sound substrate may be a candidate for restoration or a coating system. A roof with widespread moisture damage, failed materials, or structural concerns may require replacement. The best answer depends on the roof’s actual condition, not on the contractor’s preferred service.

Compare Scope and Materials, Not Just Price

When you receive estimates, make sure you are comparing equivalent work. One proposal may include tear-off, disposal, replacement flashing, underlayment, ventilation improvements, permits, and cleanup. Another may appear less expensive because those items are excluded or described vaguely.

A useful proposal identifies the roofing system, material manufacturer or product type, approximate quantity, preparation work, repair allowances, installation details, warranty coverage, and payment terms. It should also explain what happens if the crew finds dry rot, damaged decking, wet insulation, or other concealed conditions after work starts.

Price matters, but a roofing project is not a commodity purchase. The lowest proposal can be the costliest if it uses an unsuitable material, skips critical details, or leaves you with unclear warranty protection. A slightly higher initial investment may deliver better waterproofing, energy efficiency, service life, and fewer disruptions over time.

For commercial owners and facility managers, consider lifecycle cost rather than installation cost alone. A restoration coating may extend the useful life of an existing roof and reduce cooling demand, but only when the roof is a good candidate and preparation is done correctly. A replacement may cost more upfront yet be the more responsible option when the existing system is saturated or failing across a large area.

How to Choose a Roofing Contractor by Their Questions

The contractor’s questions often tell you as much as their answers. A qualified professional will want to know the age of the roof, prior repairs, active leak locations, building use, occupancy schedule, access limitations, future ownership plans, and budget priorities.

For a commercial property, they should ask whether work must be phased to limit disruption, whether rooftop equipment needs protection, and whether odor, noise, or safety requirements affect the schedule. For a residence, they should ask about attic ventilation, skylights, solar equipment, gutters, landscaping, pets, and access concerns.

Be wary of a contractor who pushes one product for every building. Metal roofing, shingles, single-ply membranes, torch down systems, and coatings can all be effective, but they serve different roof designs, budgets, and performance goals. A sound recommendation explains why a specific system is appropriate for your property and what trade-offs it involves.

Review Workmanship and Warranty Protection

Manufacturers provide material warranties, but the roof’s performance also depends on installation. Poor flashing work, weak seam details, inadequate fasteners, improper drainage, or incomplete surface preparation can cause premature failure even when premium materials are used.

Ask who will perform the work. Will the contractor use trained in-house crews, long-standing installation teams, or subcontractors? Who supervises the project? Who is your point of contact if conditions change or questions arise? Clear responsibility is a sign of an organized contractor.

Then ask for the warranty in writing. Separate the manufacturer’s material warranty from the contractor’s workmanship warranty. Confirm the duration, what is covered, what maintenance may be required, and how service requests are handled. A warranty has practical value only when the contractor has the experience, responsiveness, and stability to honor it.

Check References and Recent Project Results

Online reviews can be useful, especially when they reveal patterns in communication, cleanup, scheduling, and follow-up. Still, direct references and recent project examples provide a stronger picture of a contractor’s work.

Ask for projects similar to yours. A homeowner replacing architectural shingles should seek examples of comparable residential work. A facility manager with a large low-slope roof should ask about similar membrane, coating, or restoration projects. If possible, ask references whether the contractor communicated clearly, kept the site safe and clean, handled changes fairly, and responded after the job was complete.

A good contractor should be comfortable discussing both straightforward jobs and difficult conditions they have solved. Complex rooflines, recurring leaks, storm damage, drainage issues, dry rot, and occupied commercial buildings all require planning beyond basic installation.

Watch for Warning Signs Before You Sign

Some problems are visible before the first shingle is removed. Step back if you encounter several of these warning signs:

  • A contractor demands a large upfront payment or insists you sign immediately.
  • The estimate is vague, incomplete, or lacks material and warranty details.
  • The company cannot verify licensing or insurance coverage.
  • The salesperson promises to cover your insurance deductible or makes guarantees about claim approval.
  • The recommendation is made without a proper roof inspection.
  • Communication is inconsistent, pressured, or difficult to document in writing.

Storm damage can create urgency, but urgency should not eliminate due diligence. If a roof needs immediate protection, temporary measures can limit damage while you take the time to select a qualified contractor for permanent repairs.

Choose a Partner for the Roof’s Full Service Life

The best roofing relationship does not end when the installation crew leaves. Regular inspections and maintenance can identify failed sealant, blocked drainage, loose flashing, surface damage, and small leaks before they spread into insulation, framing, ceilings, or inventory.

This is particularly important for commercial roofs, where deferred maintenance can turn a manageable repair into operational downtime and a large capital expense. Homeowners benefit as well, especially after severe wind, snow, or heat events. Ask whether the contractor offers inspection and maintenance services, and how they document roof condition over time.

Mountain Valley Roofing approaches every project with this long-term view: protect the building now, recommend the most cost-effective solution for its condition, and help prevent the next avoidable failure. Whether you are evaluating a repair, restoration, or full replacement, choose the contractor who gives you clear information, practical options, and confidence that your roof is built for the conditions ahead.

Commercial Roofing Systems Guide for Owners

Commercial Roofing Systems Guide for Owners

A commercial roof can look serviceable from the ground while water is working its way into insulation, decking, and occupied space. For facility managers and property owners, this commercial roofing systems guide focuses on the decisions that protect the building, control long-term costs, and avoid disruptive emergency repairs. The right system is not simply the one with the lowest installation price. It is the one that fits the roof’s condition, drainage, use, and exposure to the severe sun, wind, snow, and temperature swings common in Nevada and Northern California.

Start With the Building, Not the Material

Commercial roofing is rarely a one-size-fits-all purchase. Low-slope roofs must manage standing water, ultraviolet exposure, expansion and contraction, foot traffic, rooftop equipment, and penetrations for drains, vents, and HVAC units. A system that performs well on a small retail building may not be the best fit for a warehouse, medical office, apartment complex, or industrial facility.

Before selecting a material, a qualified roofing contractor should inspect the existing roof assembly. That includes the membrane or surface, insulation, flashings, seams, drains, edge metal, roof deck, and areas around mechanical equipment. The inspection should also identify whether moisture is trapped below the current roof surface. Installing a new layer over wet insulation can hide a problem temporarily, but it does not remove the risk of deterioration, leaks, and reduced energy performance.

The building’s use matters as much as its square footage. A roof with frequent service traffic needs a system that can handle wear around walk paths and equipment. A building with high cooling costs may benefit from a reflective cool roof surface. A property with aging drainage may need slope corrections or drain improvements before a new membrane can perform as intended.

Commercial Roofing Systems Guide: Main Options

The best commercial roofing system depends on conditions at the property. Each option has strengths, limitations, and maintenance needs.

Single-Ply Membrane Roofing

Single-ply systems are widely used on low-slope commercial roofs because they provide continuous waterproofing across large areas. Common membrane options include TPO, PVC, and EPDM. TPO and PVC are often selected for their light-colored, reflective surfaces, which can help reduce heat absorption and cooling demand in hot, sunny climates. EPDM is typically dark and known for its flexibility, although it may not provide the same reflective benefit without a coating or ballast approach.

Membrane roofing can be mechanically attached, fully adhered, or installed with ballast depending on the system and building requirements. Its performance depends heavily on seam work, flashing details, and secure attachment at the perimeter. Strong winds place extra stress on roof edges and corners, so installation quality is not an area to compromise.

Single-ply membranes are often a practical choice for offices, retail buildings, warehouses, and other properties with broad, low-slope roof areas. They are not maintenance-free. Seams, penetrations, drains, and areas near rooftop equipment should be inspected regularly.

Commercial Roof Coatings and Restoration

A roof coating can be a cost-effective restoration option when the existing roof remains structurally sound and dry. Coatings create a protective surface over a compatible roof system, helping address UV exposure, minor weathering, and energy efficiency concerns. Many coatings are highly reflective, making them especially useful for facilities exposed to intense summer heat.

Restoration is not a shortcut for a roof with widespread saturated insulation, major membrane failure, unstable decking, or poor drainage. A coating follows the shape of the roof beneath it. If water ponds because of drainage problems, those conditions must be evaluated and corrected where possible before restoration work begins.

When conditions are right, a coating system can extend roof life, reduce disposal from a tear-off, and limit disruption to building operations. It also requires proper surface preparation. Cleaning, repairs, seam treatment, primer selection, and correct coating thickness all affect the result. Mountain Valley Roofing evaluates restoration first when it offers a realistic long-term benefit, not simply because it costs less upfront.

Metal Roofing Systems

Metal roofing is a durable choice for many commercial and mixed-use properties, particularly where steep-slope architecture, snow shedding, wind resistance, and long service life are priorities. Standing seam metal systems provide a clean appearance with concealed fasteners, while exposed-fastener panels can be a more economical option for certain structures.

The trade-off is that metal roofs require careful detailing around penetrations, transitions, fasteners, and panel movement. Metal expands and contracts with temperature changes. If the system is improperly installed or neglected, loose fasteners, failed sealant, and flashing issues can become leak points. A well-designed metal system paired with regular maintenance can deliver reliable protection for decades.

Modified Bitumen and Torch Down Roofing

Modified bitumen systems use asphalt-based sheets that are installed in multiple layers. Torch down roofing is one application method, although other methods may be used based on project requirements and site safety. These systems are valued for toughness, redundancy, and dependable waterproofing on low-slope roof sections.

Because modified bitumen is a layered system, it can provide strong protection in areas with regular foot traffic or demanding weather exposure. Reflective coatings may be added to improve UV resistance and reduce surface temperatures. The system’s weight, roof deck capacity, drainage conditions, and safe installation procedures should all be considered before selection.

Drainage and Flashing Decide More Than Most Owners Expect

The field of the roof gets attention because it covers the most area, but many commercial leaks begin at details. Flashings at walls, curbs, skylights, pipes, drains, and roof edges must move with the roof and remain watertight through changing temperatures. Poorly sealed penetrations can undermine an otherwise high-quality membrane.

Drainage is equally critical. Water that remains on the roof accelerates wear, increases loading, and exposes weaknesses in seams and flashings. Some ponding after a storm may occur on low-slope roofs, but water that remains for extended periods deserves attention. Clogged drains, damaged scuppers, inadequate slope, and crushed drain lines are common causes.

A replacement project is the right time to address these concerns. Adding or replacing drains, improving crickets around curbs, correcting localized low areas, and upgrading edge details can prevent repeated repair costs after the new roof is installed.

Compare Cost by Service Life, Not Installation Price

A lower bid may exclude insulation upgrades, deteriorated deck repairs, drainage corrections, premium flashing details, or a maintenance plan. Those omissions can make the initial number attractive while shifting costs into the future. A clear proposal should explain the roof assembly, removal or recovery scope, insulation approach, attachment method, flashing work, warranty terms, and anticipated disruptions.

Energy savings should also be considered carefully. Reflective roofing and adequate insulation can reduce cooling loads, but the actual benefit depends on the building’s HVAC system, occupancy, insulation levels, utility rates, and local climate. A cool roof is often a smart investment in high-sun locations, yet it should be selected as part of a complete roofing strategy rather than as a standalone selling point.

Maintenance Protects the Investment

Every commercial roof benefits from scheduled inspections, typically before and after severe weather seasons. Maintenance teams should keep drains and gutters clear, watch for damage around equipment, remove debris that holds moisture, and document repairs before they spread. Interior water stains, musty odors, rising energy use, and damaged ceiling tiles can all signal a roofing issue even when the leak is not visible on the roof surface.

Facility staff should avoid allowing unrelated trades to cut or patch the roof without coordination. HVAC, solar, communications, and maintenance work can create penetrations or damage flashings. A documented process for rooftop access and repairs helps preserve system integrity and warranty coverage.

The strongest commercial roof is the one matched to the building and cared for throughout its service life. Start with a thorough inspection, weigh restoration against replacement honestly, and choose workmanship and details that will stand up when the weather turns.